
Unlock iTunes Music Store Files
Mike writes, "I had an iPod and wish to get a different mp3 player and was wondering how I would go about transferring my iTunes music (from their store thingy) to Windows Media Player."
The one flaw in online music stores is portability of content when things change. iPods remain the hottest portable music player on the market, but what happens when they aren't any more or when people like yourself decide you want something different. Everyone who purchased music from iTunes will no longer be able to play that music on their next portable device unless it happens to be another iPod.
In fairness, purchasing tracks from Napster, Yahoo or any of the other stores creates a similar problem if you go from a PlaysForSure device to an iPod. If you want compatibility with everything, AmazonMP3 is current
ly the best option.
At one point there were a number of software solutions to automate the process of converting iTunes music store files, but iTunes broke the functionality for anyone who upgraded to iTunes 6.0 or newer. If you want to make your iTunes store purchases available outside of iTunes, there's only one g
uaranteed solution.
Burning CDs of iTunes Music Store Purchas
 Burning CDs of your iTunes Music Store purchases and ripping those CDs back to your harddrive as MP3 or WMA files is your best bet for liberating purchased tracks. There's no convenient way to do this, as iTunes is fairly cumbersome for creating burnable music playlists
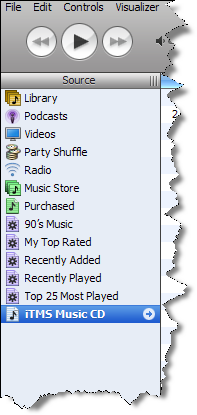
Fill your new playlist with enough tracks to fill the disk (if you have complete albums, these make natural playlists).
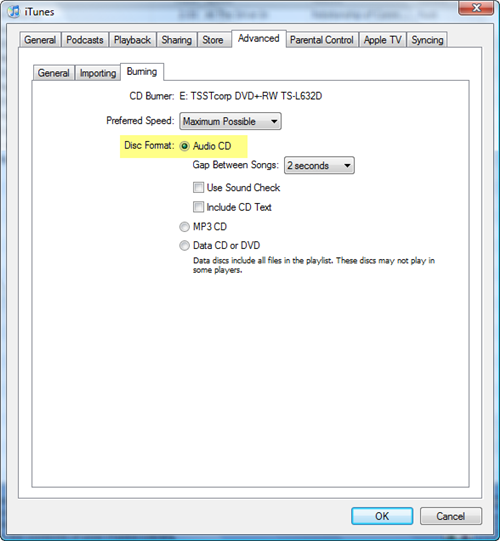
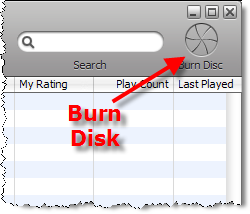
Double check the iTunes burn preferences to make sure you are creating an Audio CD by visiting Edit > Preferences > Advanced and clicking on the Burning tab. An MP3 CD or Data CD will not work in this case.
Copying files to Windows Media Player
With the newly burned disk still in your CD tray, copy the files into the My Music folder in your My Documents folder. Open Windows Media Player.
Windows Media Player watches My Music by default. By copying files there, it should recognize all the new tracks from the CD. The downside is this doesn't automatically sort things by album, so if you have a bunch of tracks from the same album you may need to reorganize them.
Watching iTunes Folders
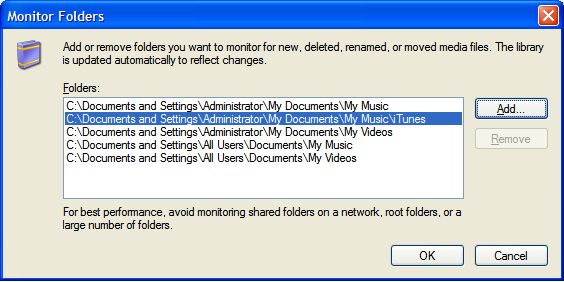
If you simply need to import MP3 files previously ripped using iTunes, you can do this without burning the tracks to disk. Open the Windows Media Player Tools > Options and click on the Library tab.
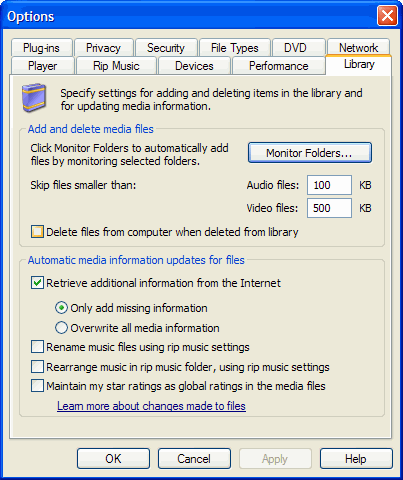
Click the Monitor Folders button and browse to locate the folder where iTunes keeps your music. This is typically My Music > iTunes, but might be somewhere else if you chose a different configuration during setup.


0 comments:
Post a Comment